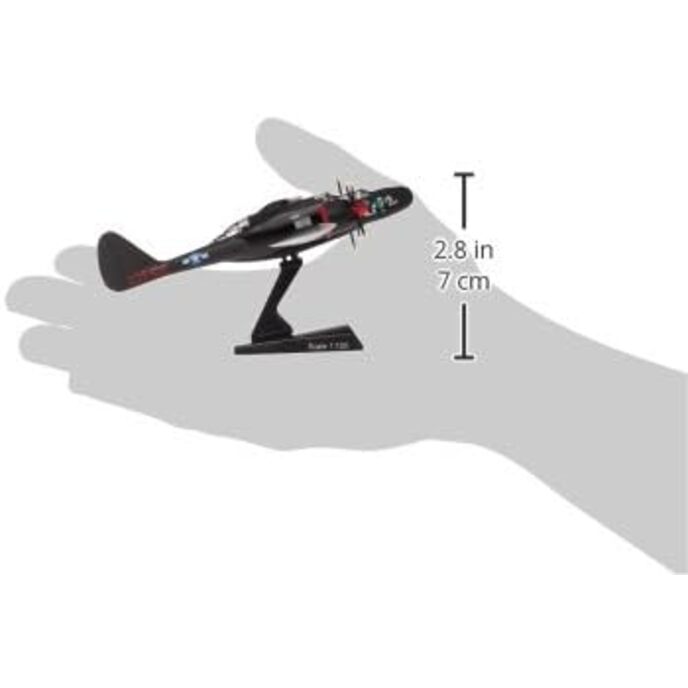
Horizontal stabilizer will invariable break free, as mine and others' did just trying to remove the item from the packaging. Probably worst choice possible used to mount the airfoil, and the plastic stabilizer is attached to the metal has to be attached using superglue, which is applied without cleaning the black paint from either surface, so the paint is the actual 'glue'. The twin booms also flex continually, which helps break free the airfoil. You have to clean the twin tail boom metal tabs of glue and paint, clean the plastic wing recesses of glue and paint, level the metal tabs and rough them up to give a good glue surface, level the plastic and similarly rough up, open up the plastic recesses so the tabs fit properly, remove paint from the thin vertical mating surfaces of the airfoil and vertical tail vertical mating surfaces to give adequate/additional gluing surfaces, probably get the superglue with the special fine point applicators, loosen the tail boom screws, try to put the superglue on without glopping, use three hands to grasp the two tail booms and position the tail plane, hold everything for a minute or so until there is an initial setup, make sure the tail booms fit firmly both into the glue recesses on the bottom of the airfoil AND the ends fot eh airfoil and vertical tail surfaces, then tighten the screws to keep the booms in place. Oh, remember this is on very small parts, so hope you have modeling equipment like mini files, dental picks, x-acto blades and a 3rd hand magnifying glass. Oh, you'll probably damage a propeller blade during all of this. And, STILL, you get a tail plane that will loosen and fall off if you sneeze too many times in the same room. Oh, and the silver turret guns and the drops tanks are just completely wrong, and you'll have to touch up the tail plane repair. If you want a model of this, I'd suggest making a 1/72 model or larger yourself. This one is a "hanger queen"/"storage box queen", and the minimal detail doesn't do the real tech on the plane justice.